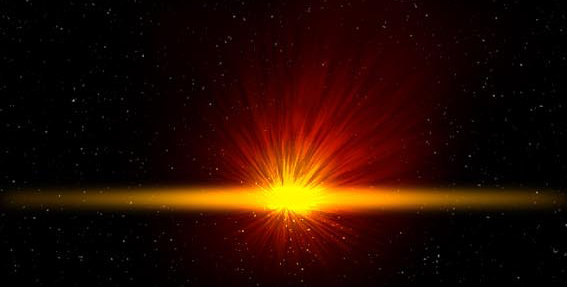
by - MrRookie
1. Creating the stars
Creating the stars is a super simple process, others make their stars with the noise filter, and then they change the levels, the problem about this technique is that it produces super uniform stars, too uniform for my taste, and I bet that for yours too.
The stars we will do here are like the ones that you can see in the background of this image, to do the stars, follow the next easy steps:
1. Rename the background layer to "Stars"
2. Lets select the "Stars" layer and apply a noise filter ( Filter/Noise/Add Noise), with an amount of 400%, check the Monochromatic checkbox.
3. Now apply a Gaussian Blur (Filter/Blur/Gaussian Blur), with a radius of 1 px, yes, yes I know that it doesnt look like stars but soon it will.
4. Now press CTRL+L to edit the levels, I will use the next input values: 172,1.00,255 you can change them in any way you want; to get different results, change the value of the first level, I recommend you a value between 170 and 190, but anyway its up to you.
2.Creating our planet
This tutorial doesnt covers the planet creation, to do that we already have a lot of tutorials available. If you're too lazy and you do not want to follow a tutorial, just search for images of planets in high resolution of stock photo sites.
3. Now the fun begins!
The fun is about to start! Well...this tutorial assumes that you have photoshop CS (its not completely necessary, the version 6 or 7 should work too), because we will be using the fiber filter. In case you do not have PS CS, there is a 2000x2000 image file with fiber filter applied, use it to follow this tutorial.
4. Creating the initial texture
To create the initial texture, create a new layer, and call it "Base Layer" and fill it using the paint bucket with any color, it does not matter. Now lets select the next colors:
#8E0000 as foreground color
#000000 as background color
Now lets apply the fibers filter (File/Render/Fibers), with the next parameters:
Variance: 21
Strenght: 7
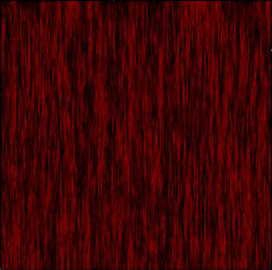
If you did this correctly , your layer should look like this:
5. Finalizing the base texture
Now, to finish our base texture, we just have to distort this a little, by applying the Polar Coordinates filter, with the Rectangular to Polar parameter turned on.
Now it begins to look like an explosion, right?
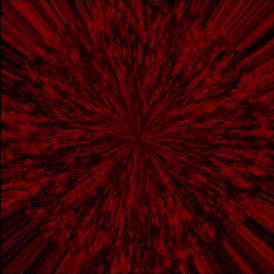
Base texture with the Polar Coordinates filter applied.
6. using Gradients
Now, create a new layer, and name it "Gradient". Hit D to reset your color palette, and then hit X to swap your background and foreground colors, then, select the gradient tool , using the next parameters shown below:
Setting of our gradient
![]()
Lets make a gradient in the "Gradient" layer, like the next one:
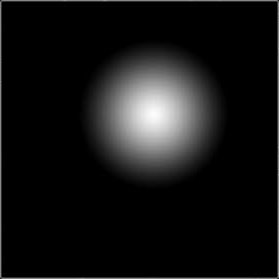
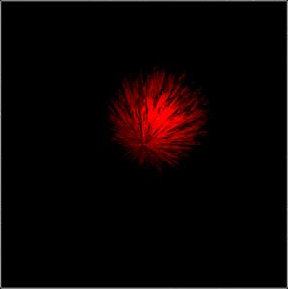
It doesnt has to be perfectly centered.. Actually, if you make it perfectly centered, the result could be very different. Now change the blending mode of the "Gradient" layer to Vivid Light. Looks much better now, right? (It looks like this:)
7. Using channels and masking
The channels like layers, but they always use grayscale colors. They are strongly related with masks, because a mask is a channel, that determines the opacity of a layer. In channel, the white color means: show it all! (with an opacity of the 100%), the black color means, hide it! (0% of opacity), a 50% gray means: reveal it with an opacity of 50% and so on. If we just let the things in the way they are, we would not be able to see the stars, right? Thats why we're masking.
Well...now select the rectangular marquee tool (hotkey: M), select the whole content of our gradient layer, and copy it (Ctrl+C), now lets go to the channels tab, and create a new channel (just in the way you create a new layer) and name it...Channel.
Now press CTRL+V to paste what we just copied (the content of the Gradient layer) to our channel.
Press CTRL+D to dismiss the rectangular selection, we dont need that one.
Then , we have a channel with a white to black radial gradient. What we have to do now is loading the channel contents in a new selection (sounds complicated? well..it isnt). You just have to press (and hold) CTRL while you click the Channel thumbnail.
Done, now we have a "marching ants" selection. In the selection, you cant see that everything is selected but all of it is selected, with the transparency. You cant see everything because Photoshop only shows the areas with an opacity of 50% or more, but all the content of that channel is contained in your selection.

We will use this selection to mask our layers "Gradient" and "Base Layer".
Now go back to the layers tab, and with our selection still active, select the "Base Layer" layer.
And press the Add Layer Mask button (the 2nd one of the ones you see here, the little rectangle with a white circle in the middle).
![]()
Lets repeat this process for the Gradient layer (Go to the channels tab, hold CTRL, click the channel thumbnail, then go back to the layers tab and add the mask layer).
If you did it as its described, your Layers tab should look like this:
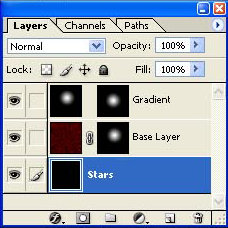
And you image should look like this:
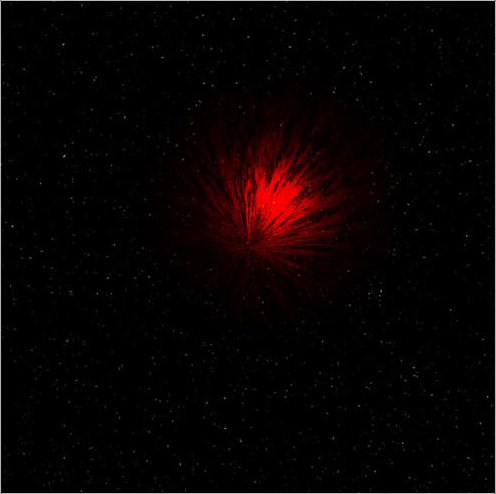
We finally see those stars again! To give direction to the explosion effect, move the Gradient layer, I will move it a little bit to the center, just a little.
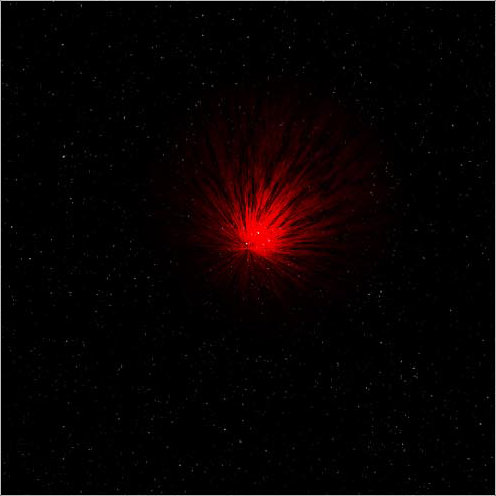
Looks better, huh?, now, you can add the planet between the "Stars" and "Base Layer" layers.
8. Adding a better color to our explosion
In order to make it look convincing, we need to add a masked Gradient Map layer, we are masking it because we dont want it to change the color of the stars and the planet(s).
First, we have to load the selection of our "Channel" channel (You remember how to do it, right?).
Lets add, with our selection still active , a new Gradient Map layer, to do this go to layer/New adjustment Layer/Gradient map. lets give it a name..."Color layer" will work fine. Leave the rest of the options with thr default settings.
Now, you will see a new window, where we should select (or make) a gradient. Unfortunately, Photoshop does not includes a gradient that meets our needs. We will edit our own gradient (or you can use the one this one).
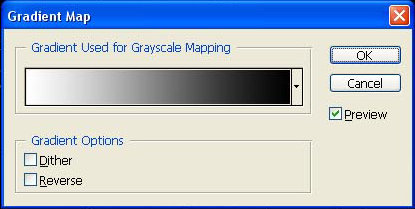
Click in any place of the gradient to open the Gradient Editor. In case you want to create it by yourself, use the next values for your colors:
Color: #000000, location: 0%
Color: #FF4E00, location: 19%
Color: #FFB400, location: 26%
Color: #FFF600, location: 40%
If you dont want, or you cant make the gradient by yourself, you can find the file with the gradient in the zip file too.
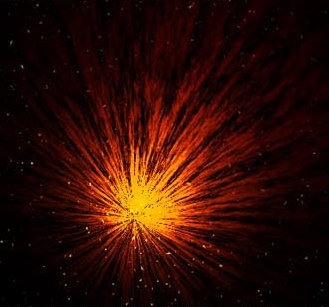
If you followed all the steps up to this point correctly, your result shouldnt look very different from the one that is shown above.
Now lets smooth our effect, select the "Base Layer" and, working on the layer (not on the mask!), apply a radial blur with the next settings:
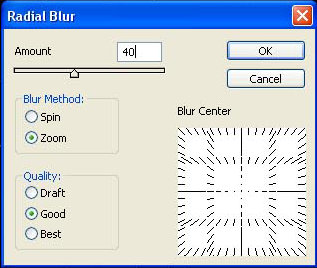
This should smooth a lot the effect, now, that if you want to wait it noisy, leave it in the way it was. Try with different values of the amount parameter, till you get a good result.
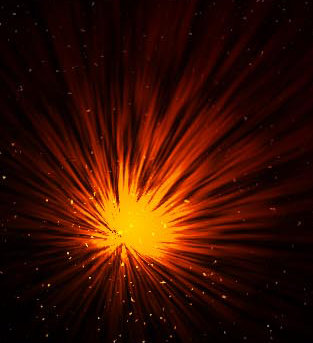
It should look like this now, we almost finish!
9. Finishing touches
Now, you just have to add a few details, that will be made with soft brushes.
Create a new layer, put it on the top and name it Glare, select the brush tool (hotkey:B). Now, select a soft brush, with a diameter of 200px, an opacity of 100% and a flow of 1%.
Select the Pure Red color from your swatches, and make some soft strokes a little bigger than all the explosion, try to make them smooth. Now, select the Pure Orange, and brush it a little more, this time do it a little closer from the center, now select the Pure Yellow and brush it again, this time try to make them only in the center.
The result after the brushing.
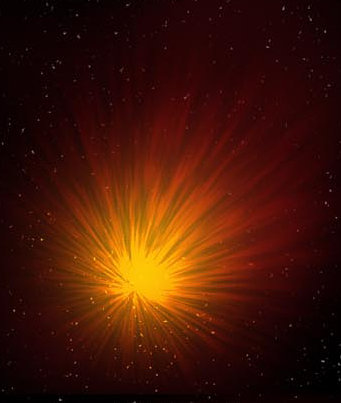
Now, you can change the Glare's blending mode, I will use Hard Light, and my layer will have an opacity of 100%. Looks better, doesnt it?. You should always try with different blending modes, compare the results, and choose the one that suits your fancy.
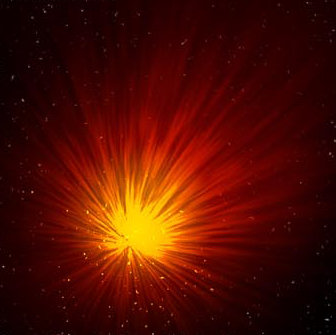
Now there is just a little detail to add, that is a classical effect from all the spectacular explorions, to do this, select the brush tool again, and make a new layer, name it "Ray".
Now, choose the 45px soft brush, with an opacity of 100% and a flow of 1%, click in the center of the explosion, press and hold shift, and then start moving the mouse to the left, and to the right, over and over again, then start moving it more to the center, the closest to the center of the explosion, the more times you will have to move your mouse in that area. The center should have more opacity than the edges. It should not be perfect, it should look like this:
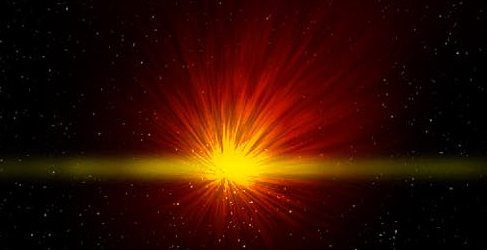
Now the effect looks a little rought, but we will apply a motion blur filter with the next settings:
Angle : 0
Distance: 250
This should smooth the content of this layer. Now apply an outer glow, with color = #FF7200, and the next settings:
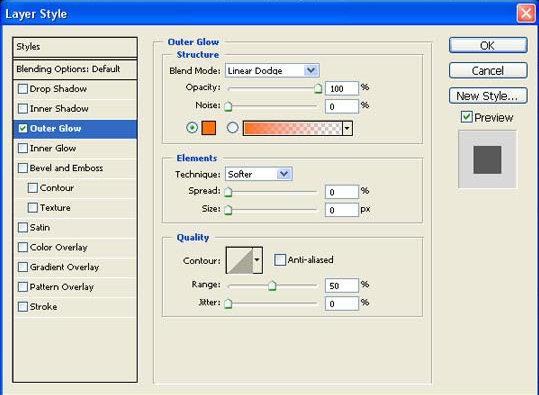
Oh yes! Finished product!, I hope this tutorial was helpful, remember that you should always experiment to get different results, do not just do what others tell you to do.
